
Minimal Mistakes 实战配置
前置要求(Prerequisites)
注意:进行 Jekyll 主题 Minimal Mistakes 配置的前提是 Jekyll 的本地环境已经搭建好了,即:能够在本地通过运行
bundle exec jekyll serve启动一个网站。这样才能在 Minimal Mistakes 配置过程中方便进行调试。
下面简单贴出 Jekyll 配置过程中的关键文件,
# 配置 Gem 包的位置,让其出现在项目文件夹内
# 运行之后,相关的配置信息会出现在 ./.bundle/config 内
$ bundle config set --local path 'vendor/bundle'
# ./Gemfile
# 这个配置采用的是 Minimal Mistakes 远程主题的配置方法, 是为了最后方便通过 GitHub Pages 的方式进行部署
# Ref: https://mmistakes.github.io/minimal-mistakes/docs/quick-start-guide/#remote-theme-method
source 'https://rubygems.org'

group :jekyll_plugins do
  gem "github-pages"
  gem "jekyll-include-cache"
end
# ./.gitignore
_site
.sass-cache
.jekyll-metadata
Gemfile.lock
vendor
.bundle
关于
:jekyll_plugins的简单说明,我自己对于:jekyll_plugins的理解是为了让在其中的gem,无论如何都会被加载,不管站点的配置情况如何;相反,直接用gem "xxx"的话就是只有当配置正确时,此插件才会加载。具体详见这里。
在开始之前,为了方便本地调试,可以先考虑对 ./Gemfile 文件做如下修改,
# ./Gemfile
source 'https://rubygems.org'

gem "minimal-mistakes-jekyll"
之所以这样修改是因为前面那种远程主题的配置方法,主题的文件并不会被下载到本地(只是为了方便 GitHub Pages 进行部署),但这对于本地调试并不方便,调试的时候还是需要将主题文件下载到本地的。之后会记录一些在配置过程中,不是那么容易的选项。
覆盖主题默认设置(Overriding Theme Defaults)
在对一个主题进行配置的时候肯定避免不了对主题的默认设置进行修改,这里简单说一下在 Jekyll 中修改 gem 主题的一个基本逻辑。当将主题作为 Ruby Gem 安装时,其 layouts、includes、stylesheets 和 assets 都打包在 gem 主题中。这就意味着它们在网站的项目中不易被看到1。
上面提到的这些文件都可以被修改,但需要先将默认版本复制到网站的项目中。例如,如果想修改默认的 single 布局,需要先将其复制到 _layouts/single.html 。
注意,如果想要定位主题文件,请运行
bundle info minimal-mistakes-jekyll。然后将想要覆盖的文件从返回的路径复制到网站项目中的适当文件夹。
Jekyll 会首先使用网站项目中的文件,然后再回退到主题的默认版本。它在以下文件夹中的文件上表现出这种行为:
/assets
/_layouts
/_includes
/_sass
注意,从
v4.5.0开始,theme-gem 还将通过插件对/_data展示上述行为。因此,UI 文本(UI Text)和导航(Navigation)的数据文件也包含在 theme-gem 中。不过,如果您是在 GitHub Pages 上构建网站,则不适用。
站点区域设置(Site locale)
site.locale 用于声明网站中每个网页的主要语言。比如:locale: "en-US" 将网站的 lang 属性设置为美国英语版本,而 en-GB 则是英国英语风格。国家代码是可选的,要查找您的语言和国家代码,请查看此参考表。正确设置网站的地域对于关联在 UI 文本数据文件中找到的本地化文本非常重要。不正确的匹配会导致 UI 的某些部分消失(例如按钮标签、章节标题等)。
Minimal Mistakes 主题默认附带英文本地化文本(en,en-US,en-GB)。如果将 _config.yml 中的 locale 更改为其他内容,大多数用户界面文本将变为空白。请务必将相应的区域设置键和翻译文本添加到 _data/ui-text.yml 中,以避免这种情况。具体的配置步骤如下,
首先,查找到 Minimal Mistakes 主题文件路径所在,
$ bundle info --path minimal-mistakes
/home/PATH/TO/vendor/bundle/ruby/3.3.0/gems/minimal-mistakes-jekyll-4.26.2
接着,将主题文件夹下的 _data/ui-text.yml 文件拷贝到网站文件夹 _data 下,即:同名路径下,
# 注意:当前是在网站的根目录下
cp $(bundle info --path minimal-mistakes)/_data/ui-text.yml ./_data/
最后,修改 ./_config.yml 文件的 locale 选项,将其改为自己想设置的区域,比如:
locale: "zh-CN"
保存修改,重新构建网站 bundle exec jekyll serve 看看是否设置成功。
注意,基本所有的要对主题某个部分进行自定义的操作都和上面的步骤类似,后面再进行配置的时候可能就不再累述了。
评论(Comments)
关于评论部分的配置,具体的配置取决于选取的评论的提供商(Comment Provider),大多提供商给出的配置步骤都比较详细,在这就不在累述了,详见网站。而这里主要强调一下配置评论过程中几个关键的点,
-
comments.provider: 选择你喜欢的评论提供商(Comment Provider); -
defaults.[0].values.comments: 为文章开启评论; -
在
development环境中评论已禁用。要在本地测试/构建时启用,请确保强制设置为生产环境2,$ JEKYLL_ENV=production bundle exec jekyll serve
只要在为网站配置评论时注意以上几点,基本就能在重新构建网站时看到评论区的出现。
站内搜索(Site search)
对于站内搜索,以 Algolia 为例,可能需要注意的就是,在 Gemfile 文件中加入 jekyll-algolia,
#./Gemfile
source 'https://rubygems.org'

gem "minimal-mistakes-jekyll"

+ group :jekyll_plugins do
+   gem "jekyll-algolia"
+ end
然后再运行命令 bundle update 更新一下 Gem。以及在最后配置完成之后,需要运行下面的命令,
$ ALGOLIA_API_KEY=your_admin_api_key bundle exec jekyll algolia
使得 Algolia 能够在网站上建立索引。
SEO、社交分享和分析设置
Google Search Console
配置严格按照网站给出的步骤来即可,关键就是完成配置之后 google_site_verification 应该上哪去找,在 Google Search Console 的配置页面,依次选择【设置 - 用户和权限】,找到用户一栏,点击三个点,
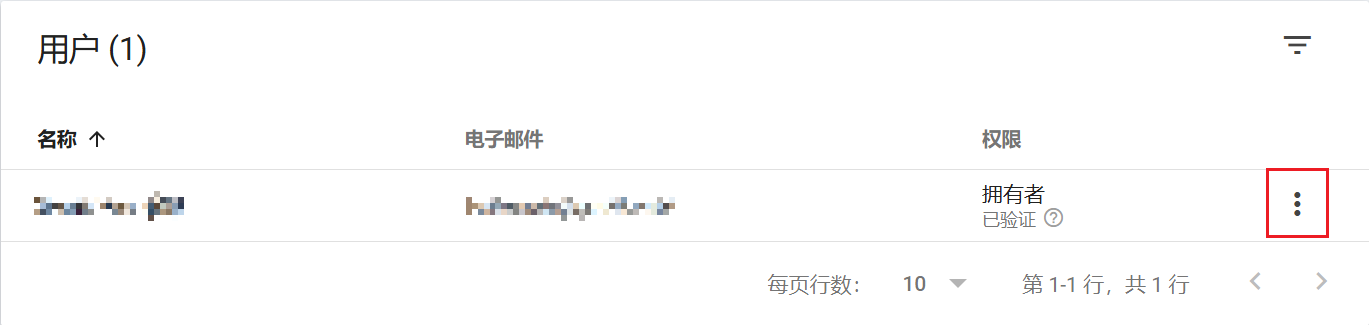
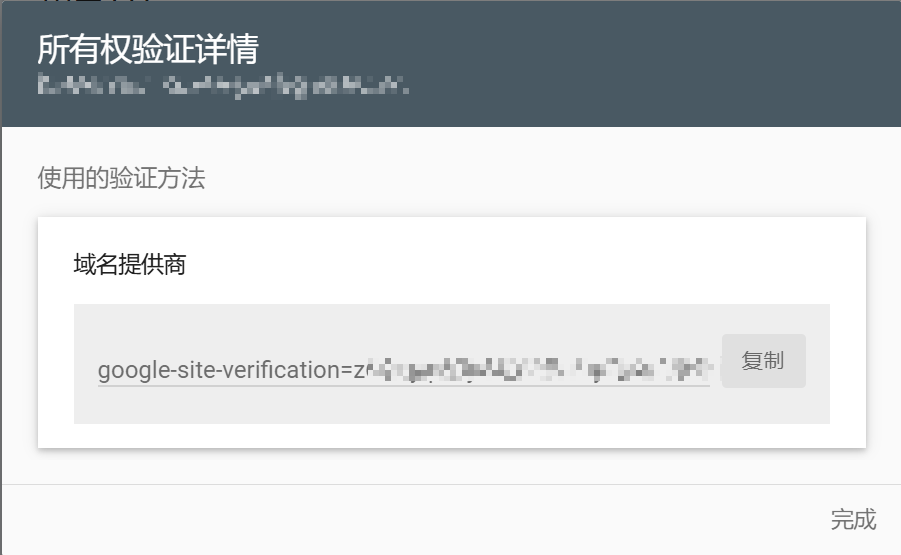
在弹出的选项框中,选择【所有权验证详情】,即可找到 google-site-verification,
注意:可以通过 Google Analytics 验证网站所有权,就可能不需要配置 Google Search Console。
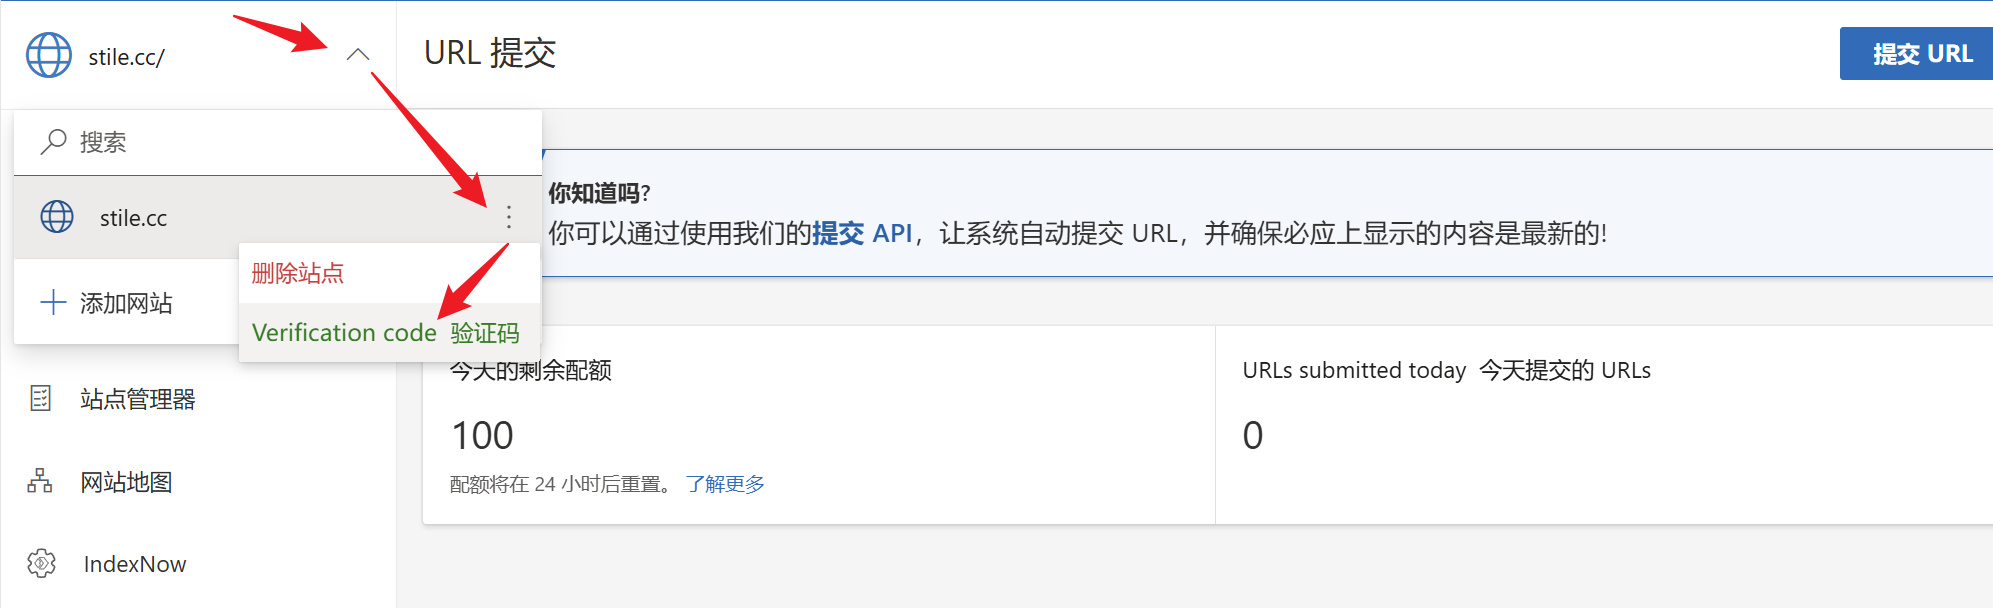
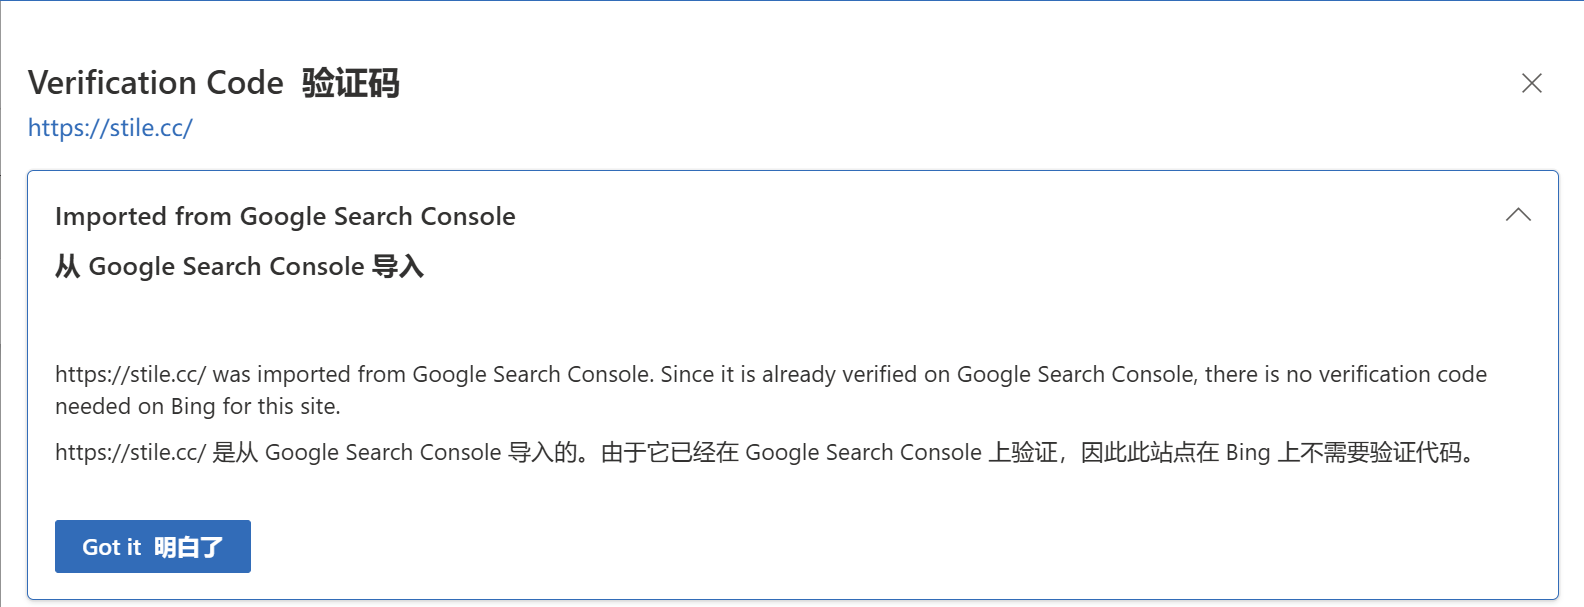
Bing Webmaster Tools
必应站长工具(Bing Webmaster Tools)可以通过前面配置的 Google 搜索控制台(Google Search Console)进行验证,所以必应站长工具不再需要验证代码。
分析(Analytics)
Minimal Mistakes 提供了 3 种不同的分析(Analytics)选项,对应于主题目录下 _includes/analytics-providers 文件夹下,
- Google Standard Analytics:
_includes/analytics-providers/google.html - Google Universal Analytics:
_includes/analytics-providers/google-universal.html - Google Analytics Global Site Tag:
_includes/analytics-providers/google-gtag.html
所以,只需要在网站的 _config.yml 配置如下参数即可,
analytics:
  provider: "google-gtag" # false (default), "google", "google-universal", "google-gtag", "custom"
  google:
    tracking_id: "G-xxxxxxxxxx"
    anonymize_ip: false # default
配置完成后,重新构建网站 JEKYLL_ENV=production bundle exec jekyll serve,就能在网站上任何页面的源代码的底部看到 Google Analytics 脚本被注入,类似于,
<!-- Google tag (gtag.js) -->
<script async src="https://www.googletagmanager.com/gtag/js?id=G-xxxxxxxxxx"></script>
<script>
  window.dataLayer = window.dataLayer || [];
  function gtag(){dataLayer.push(arguments);}
  gtag('js', new Date());

  gtag('config', 'G-xxxxxxxxxx');
</script>
注意,如果有其它的需求,可以使用
_includes/analytics-providers/custom.html进行个性化设置。
Front Matter Defaults(前言默认设置)
为了节省设置文章、页面和集合的前置内容默认值的时间,这是最佳选择。当然,也可以在每个文件中分配布局并切换阅读时间、评论和社交分享等设置,但这肯定比较麻烦。具体的前言默认设置如下,
# Defaults
defaults:
  # _posts
  - scope:
      path: ""
      type: posts
    values:
      layout: single
      author_profile: true
      read_time: true
      comments: true
      share: true
      related: true
      show_date: true
  # _pages
  - scope:
      path: ""
      type: pages
    values:
      layout: single
      author_profile: true
插件(Plugins)
在使用 GitHub Pages 托管时,一小部分 gem 已被列入白名单以供使用3。该主题使用了其中的一些,可以在 gems 下找到。其他设置和配置记录在以下链接中,
- jekyll-paginate: Jekyll 的分页生成器;
- jekyll-sitemap: 用于静默生成符合 sitemaps.org 标准的 Jekyll 网站地图;
- jekyll-gist: 在 Jekyll 网站中显示 GitHub Gists 的 Liquid 标签;
- jekyll-feed: 用于生成 Jekyll 文章的 Atom(类似 RSS)订阅源;
- jekyll-include-cache: 缓存 Liquid 包含的 Liquid 标签。
注意,如果在其他地方托管,那么实际上不必担心什么是白名单,因为可以自由地包含任何想要的 Jekyll 插件。
归档设置(Archive settings)
Minimal-Mistakes 主题支持分类(类别和标签)页面。托管在 GitHub Pages 的网站需要使用仅 Liquid 的方法,
category_archive:
  type: liquid
  path: /categories/
tag_archive:
  type: liquid
  path: /tags/
但是可以考虑可以使用像 jekyll-archives 这样的插件自动生成这些页面。jekyll-archives 将提供更好的体验,因为会生成独立的分类页面,并且它们的相应链接将是“真实的”(而不仅仅是指向更大索引的哈希/片段链接)。首先,先安装 jekyll-archives 插件,可以运行 gem install jekyll-archives 或将以下内容添加到 Gemfile 中:
group :jekyll_plugins do
  gem "jekyll-archives"
end
然后运行 bundle install 进行安装。之后,将 type 更改为 jekyll-archives 并应用以下配置:
category_archive:
  type: jekyll-archives
  path: /categories/
tag_archive:
  type: jekyll-archives
  path: /tags/
jekyll-archives:
  enabled:
    - categories
    - tags
  layouts:
    category: archive-taxonomy
    tag: archive-taxonomy
  permalinks:
    category: /categories/:name/
    tag: /tags/:name/
要将 Front Matter 默认值应用于由 jekyll-archives 插件生成的页面,可以在 _config.yml 的 defaults 字段设置,
defaults:
  - scope:
      path: ""
      type: tag
    values:
      author_profile: true
  - scope:
      path: ""
      type: category
    values:
      comments: false
导航(Navigation)
通过 Jekyll 数据文件自定义网站导航链接4。
页眉(Masthead)
页眉链接使用 priority plus 设计模式。意思是,显示尽可能多的导航项,以便水平排列,并有一个切换按钮来显示其余部分,即:会生成一个响应式的页眉。要定义这些链接,需要在 _data/navigation.yml 中的 main 键下添加标题和网址:
main:
  - title: "Posts"
    url: /year-archive/
  - title: "Categories"
    url: /categories/
  - title: "Tags"
    url: /tags/
注意,可以在
main键中为每个标题添加一个description键。当用户在桌面浏览器上悬停在链接上时,这个description将显示为工具提示。
自定义侧边栏导航菜单(Custom sidebar navigation menu)
有关设置自定义导航菜单的信息,请参阅侧边栏文档(sidebars documentation)。
布局(Layouts)
单一布局(Single layout)-宽页面(Wide page)
对于宽页面,如果页面包含目录,它将不再出现在右侧。相反,它将被强制放入主内容容器中,紧接在页面标题之后。
经过一番取舍之后,还是决定保留目录设置,去掉宽页面设置。
目录(Table of contents)
关于目录的配置,在这主要配置两个可选参数,
toc: true: 启用目录;toc_sticky: true: 将目录固定在屏幕顶部。
defaults:
  # _posts
  - scope:
      path: ""
      type: posts
    values:
+     toc: true
+     toc_sticky: true
Post 和 Page 的摘要
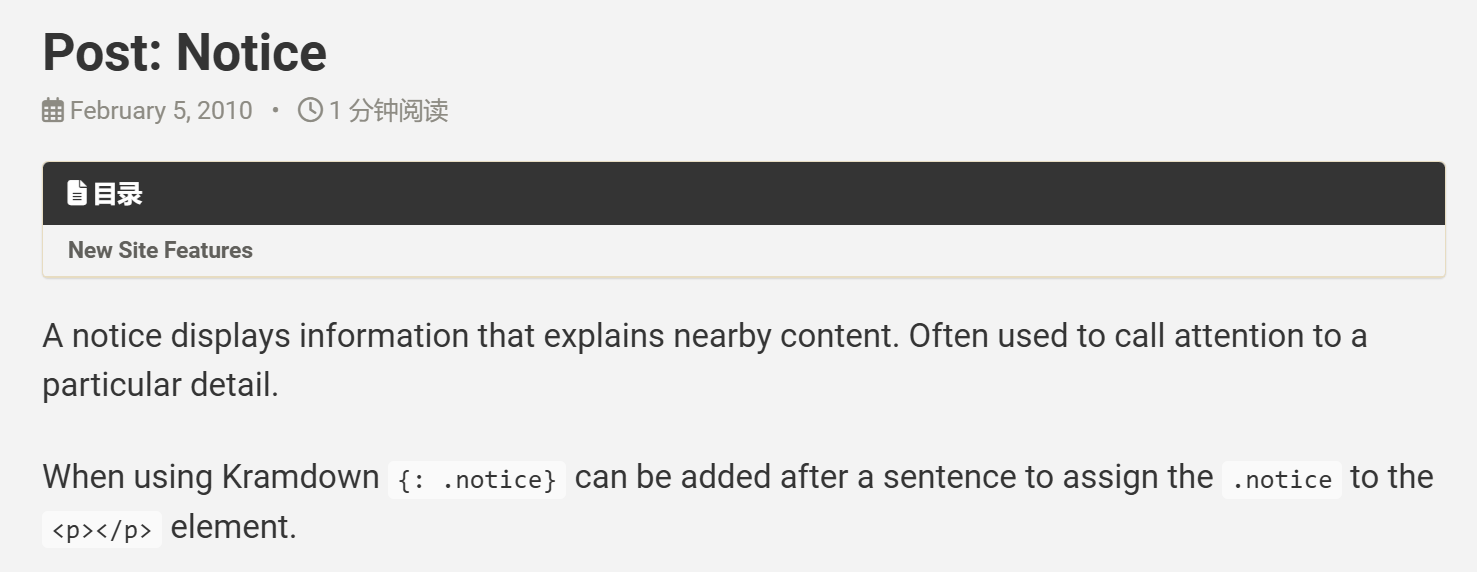
post 和 page 的摘要是由 Jekyll 自动生成的,它抓取文本的第一段。要用更具体的内容覆盖此文本,请使用以下 YAML Front Matter:
excerpt: "A unique line of text to describe this post that will display in an archive listing and meta description with SEO benefits."
归档布局(Achieve layout)-宽页面(Wide page)
由于需要开启目录的 post 和 page 不使用归档布局,而使用归档布局不用开启目录,故可以为其配置宽页面,
defaults:
  - scope:
      path: ""
      type: archive
    values:
+     classes: wide
同样地,还可以为其他不需要开启目录的布局,配置宽页面,比如:tag 和 category 等等,后面就不再累述。
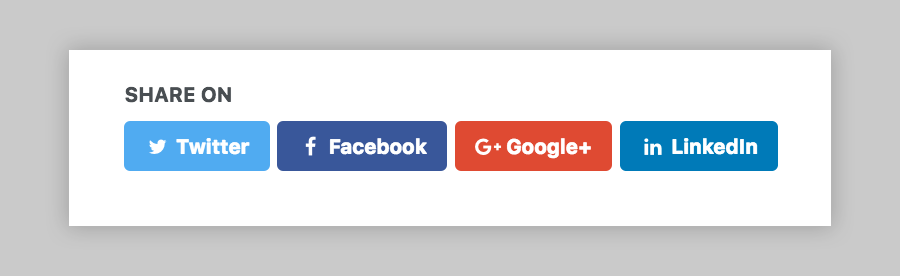
社交分享链接(Social sharing links)
关于如何修改 Minimal-Mistakes 的默认样式,需要参考 Minimal-Mistakes 主题文件夹在网站目录下创建三个对应的路径,并拷贝相应的文件,
-
/assets/css/main.scss--- # Only the main Sass file needs front matter (the dashes are enough) search: false --- @charset "utf-8"; @import "minimal-mistakes/skins/default"; // skin @import "minimal-mistakes"; // main partials- 顶部的
YAML Front Matter告诉 Jekyll 它需要处理该文件; @import "minimal-mistakes"告诉 Sass 在工作目录根目录下的sass目录(默认为_sass/)中查找名为"minimal-mistakes"的文件;@import "minimal-mistakes/skins/default"同理。
- 顶部的
-
/_sass/minimal-mistakes.scss/* Copyright comment */ @import "minimal-mistakes/copyright"; /* Variables */ @import "minimal-mistakes/variables"; /* Mixins and functions */ @import "minimal-mistakes/vendor/breakpoint/breakpoint"; @include breakpoint-set("to ems", true); @import "minimal-mistakes/vendor/magnific-popup/magnific-popup"; // Magnific Popup @import "minimal-mistakes/vendor/susy/susy"; @import "minimal-mistakes/mixins"; /* Core CSS */ @import "minimal-mistakes/reset"; @import "minimal-mistakes/base"; @import "minimal-mistakes/forms"; @import "minimal-mistakes/tables"; @import "minimal-mistakes/animations"; /* Components */ @import "minimal-mistakes/buttons"; @import "minimal-mistakes/notices"; @import "minimal-mistakes/masthead"; @import "minimal-mistakes/navigation"; @import "minimal-mistakes/footer"; @import "minimal-mistakes/search"; @import "minimal-mistakes/syntax"; /* Utility classes */ @import "minimal-mistakes/utilities"; /* Layout specific */ @import "minimal-mistakes/page"; @import "minimal-mistakes/archive"; @import "minimal-mistakes/sidebar"; @import "minimal-mistakes/print";- 同理,这个文件中的
@import "xxxxxx"也全部都是告诉 Sass 它需要的文件应该上哪去找。
- 同理,这个文件中的
-
/_sass/minimal-mistakes/xxx.scss: 真正想要去修改,进行个性化设置的文件。
总结来说,前两个文件 main.scss 和 minimal-mistakes.scss 均是在为 jeklly 能够选择网站下自定义的 .scss 文件进行渲染做的铺垫。如果不进行这样的铺垫,仅拷贝第三个文件,即:真正想要修改的 xxx.scss 文件,会发现无论怎么进行修改 xxx.scss 文件,网站依旧维持原样,因为 jeklly 依旧使用了 Minimal Mistakes 主题下的 .scss 文件进行网页渲染。
当然最关键的,还是 /assets/css/main.scss 文件,这是告诉 jeklly 使用网站下 .scss 文件进行网页渲染的关键,只要在 _sass/ 放置对应的 .scss 文件即可,需要与 /assets/css/main.scss 文件中所 @import 的对应。至于前面所说的第二个文件,只是为了严格与 Minimal Mistakes 主题文件的结构严格对应,方便后续维护罢了,这也是 Jekyll 官方 和 Minimal Mistakes 主题官方所建议的修改方式。
下面以社交分享链接(包括,侧边栏的社交链接)为例,展示一下修改这些链接以及进行个性化配置的步骤5。
侧边栏社交链接配置
首先,先说一下,关于侧边栏社交链接的修改和配置,

-
添加侧边栏社交链接只需要在下面所示的
/_config.yml文件对应位置处添加相应的条目即可。比如:以知乎为例进行说明,author: links: - label: "Zhihu" icon: "fa-brands fa-fw fa-zhihu" url: "https://www.zhihu.com/people/xxx" -
对侧边栏社交链接的配置,主要是针对
icon字段所使用的 FA 图标进行个性化配色设置,需要修改两个地方,/* /_sass/minimal-mistakes/_utilities.scss */ .social-icons { .fas, .fab, .far, .fal { color: $text-color; } @each $color, $icons in ( $zhihu-color: ".fa-zhihu", // 通过变量 $zhihu-color 为 .fa-zhihu 分配颜色 ) { #{$icons} { color: $color; } } }/* /_sass/minimal-mistakes/_variables.scss */ /* brands */ $zhihu-color: #0084FF !default; // 为变量 $zhihu-color 赋值
文章底部社交分享链接配置
接着,来修改一下 post 底部社交分享链接配置,
-
添加社交分享链接只需要在
/_includes/social-share.html文件对应位置处添加条目即可。比如: 以微信为例,<section class="page__share"> <h4 class="page__share-title">分享</h4> <!-- 下面是需要添加的部分,一对<a></a>标签对应一个button --> <a href="javascript:void(0)" class="btn btn--wechat" onclick="window.open('/assets/images/wechat-qr.png', 'wechat-qrcode', 'left=20,top=20,width=520,height=520,toolbar=1,resizable=0'); return false;" title="关注: 微信"> <i class="fab fa-fw fa-weixin" aria-hidden="true"></i><span> 公众号</span> </a> -
创建好 button 实例之后,剩下的就是对 button 进行个性化配置,
/* /_sass/minimal-mistakes/_buttons.scss */
.btn {
    /* button colors */
  	$buttoncolors:
      (wechat, $wechat-color );
}
/* /_sass/minimal-mistakes/_variables.scss */ /* brands */ $wechat-color: #50B674 !default; // 为变量 $coffee-color 赋值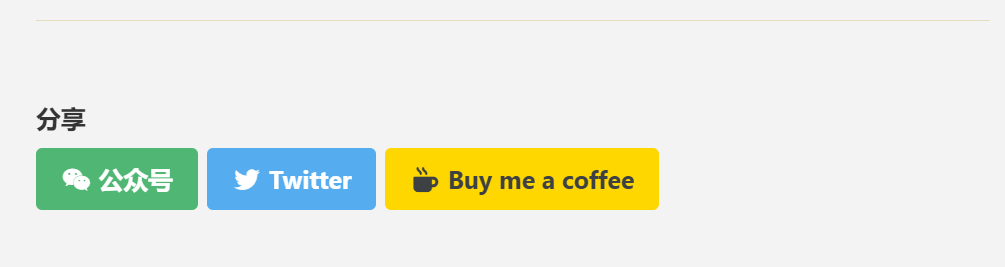
注意,可能需要在
/config.yml文件中的include处添加如下内容才能在最终的网站中展示scss配置的结果,include: - .htaccess - _pages + - _sass
自定义页眉和页脚(Custom head and footer)
页眉(Head)
要自定义页眉(Head)可以在网站引入 /_includes/head/custom.html 文件,该文件会被包含在 <head> 标签的末尾。
通过 /_includes/head/custom.html 文件自定义页眉,可以为,
-
网站导入 favicons 图标,
需要先从 RealFaviconGenerator 网站上传图标,并进行个性化设置,生成一组 favicons 图标,网站会提供如下代码,
<!-- /_includes/head/custom.html -->
<!-- start custom head snippets -->
<!-- insert favicons. use https://realfavicongenerator.net/ -->
<!-- 设置网站 favicons 图标-->
<link rel="icon" type="image/png" href="/assets/favicons/favicon-96x96.png" sizes="96x96" />
<link rel="icon" type="image/svg+xml" href="/assets/favicons/favicon.svg" />
<link rel="shortcut icon" href="/assets/favicons/favicon.ico" />
<link rel="apple-touch-icon" sizes="180x180" href="/assets/favicons/apple-touch-icon.png" />
<meta name="apple-mobile-web-app-title" content="STiLE" />
<link rel="manifest" href="/assets/favicons/site.webmanifest" />
<!-- end custom head snippets -->
-
网站导入自定义字体,
同样在
/_includes/head/custom.html文件中通过<link>标签导入想要的网络字体,<!-- /_includes/head/custom.html --> <!-- start custom head snippets --> <!-- 引入思源宋体(Noto Serif SC) --> <link rel="stylesheet" href="https://fonts.googleapis.com/css2?family=Noto+Serif+SC:wght@300;400;700&display=swap"> <!-- 引入思源黑体(Noto Sans SC) --> <link rel="stylesheet" href="https://fonts.googleapis.com/css2?family=Noto+Sans+SC:wght@300;400;700&display=swap"> <!-- 引入 霞鹜文楷(LXGW WenKai) --> <link rel="stylesheet" href="https://cdn.jsdelivr.net/gh/lxgw/LxgwWenkai-Webfont@latest/style.css"> <!-- end custom head snippets -->同时还需要,在
/_sass/minimal-mistakes/_variables.scss中配置导入的字体,/* system typefaces */ $serif: "Noto Sans SC", Georgia, Times, serif !default; $sans-serif: "Noto Sans SC", -apple-system, BlinkMacSystemFont, "Roboto", "Segoe UI", "Helvetica Neue", "Lucida Grande", Arial, sans-serif !default;
页脚(Footer)
要自定义页脚(Footer)可以在网站引入 /_includes/footer/custom.html 文件,该文件会被包含在 <footer> 标签的开头。
通过 /_includes/footer/custom.html 文件自定义页眉,可以为,
-
网站配置知识共享许可协议(比如:BY-NC-SA 协议)
/_includes/footer/custom.html文件中添加如下内容,<!-- /_includes/footer/custom.html --> <!-- start custom footer snippets --> <!-- 配置网站知识共享许可协议 --> <div class="license-container"> <a rel="license" href="https://creativecommons.org/licenses/by-nc-sa/4.0/deed.zh"> <img class="license-icon" alt="CC 许可协议" src="/assets/images/by-nc-sa.png"> </a> <p> 本站内容采用 <a rel="license" href="https://creativecommons.org/licenses/by-nc-sa/4.0/deed.zh"> CC BY-NC-SA 4.0 许可协议 </a>,除非另有声明。 </p> </div> <!-- end custom footer snippets -->接着,再在
/_sass/custom.scss文件中对配置的知识共享许可协议的html代码进行一下美化,/* 配置网站知识共享许可协议的样式(/_includes/footer/custom.html) */ .license-container { text-align: center; /* 居中对齐 */ font-size: 14px; /* 适当调整字体大小 */ color: #555; /* 提高对比度 */ padding: 15px 0; /* 增加上下间距 */ } .license-container p { margin-bottom: 10px; /* 文字和图标之间的间距 */ } .license-container a { text-decoration: none; /* 去掉下划线 */ color: #d9534f; /* 让超链接颜色变成深红色,吸引注意 */ font-weight: bold; /* 加粗 */ } .license-icon { display: block; margin: 0 auto; width: 140px; /* 放大图标 */ opacity: 0.9; transition: transform 0.3s ease-in-out, opacity 0.3s; } .license-icon:hover { transform: scale(1.1); /* 悬停放大 */ opacity: 1; }最后的效果,

注意,要让
/_sass/custom.scss文件生效,还需要在/assets/css/main.scss文件中对其进行导入,--- # Only the main Sass file needs front matter (the dashes are enough) search: false --- @import "custom";(P.S., 之前尝试过直接将
/_sass/custom.scss中的代码放到/assets/css/main.scss文件或者/_sass/minimal-mistakes.scss文件中,但在实际部署到 GitHub Pages 上时,二者的配置均没有生效)
其他的一些配置
Post 阅读体验优化
字体、行高配置
在上传了一篇之前自己写的文章之后发现,Minimal Mistakes 主题原有的字体、字号以及行高等等,对中文字体的文章并不是那么友好,于是便有了如下的优化(其中,关于字体的修改在前面也已经提到过了),同样是在 /_sass/custom.scss 中进行配置,
/* /_sass/custom.scss */
// 自定义本地化中文字体,不依赖于 Google Fonts
// 使用思源黑体(Noto Sans SC)
@font-face {
    font-family: "Noto Sans SC";
    src: url("../fonts/NotoSansSC-Regular.ttf") format("opentype");
    font-weight: normal;
}

@font-face {
    font-family: "Noto Sans SC";
    src: url("../fonts/NotoSansSC-Bold.ttf") format("opentype");
    font-weight: bold;
}


// 让正文字体稍微大一些,行距保持舒适
.page__content p,
.page__content li,
.page__content blockquote,
.page__content table,
.page__content td,
.page__content th {
    font-size: 18px !important; // 适当调整到 15.5px
    line-height: 1.8 !important; // 增加行距,让阅读更舒适
}

// 让小标题字体适当放大,增强层次感
.page__content h2 {
    font-size: 24px !important;
    font-weight: bold !important;
}

.page__content h3 {
    font-size: 21px !important;
    font-weight: bold !important;
}

.page__content h4 {
    font-size: 19px !important;
    font-weight: bold !important;
}

// 代码块字体不变,避免影响排版
.page__content code,
.page__content pre {
    font-size: 16px !important;
}
注意,对于字号的设置,原本是想着在
/_sass/minimal-mistakes/_variables.scss中进行配置,也在该文件中发现了类于type-size-x以及$h-size-x这样的变量,但是修改后发现没有效果。无奈只好通过/_sass/custom.scss,但是需要指出的是上面这样的修改方式比较依赖于网页结构,不够灵活,如果后续网页结构变化的话,上述修改可能会失效。(P.S., 关于 Post 页宽的配置,之前也尝试过通过
/_sass/custom.scss,但是效果不好,会破坏网页原本的自适应效果;而通过主题提供的classes: wide进行配置,目前暂不考虑,因为还是想目录能够尽可能地出现在侧边方便阅读)
内联代码配置
原本 Minimal Mistakes 主题自带的内联代码的样式和背景过于接近,所以在配置中稍微提升了一下对比度。关于内联代码的样式可以直接在 /_sass/minimal-mistakes/_variables.scss 中进行配置,
/* /_sass/minimal-mistakes/_variables.scss */
/*
   Colors
   ========================================================================== */
$code-background-color: #e9ecef !default;
网站明/暗模式切换
很多静态博客框架的主题都会内置网站明/暗模式切换的功能,只需要通过主题的配置文件启用即可。但很遗憾 Minimal Mistakes 主题并没有直接提供这项功能,好消息是在 Minimal Mistakes 的 Github 仓库的一个讨论6中给出了一个解决办法,利用 Minimal Mistakes 主题提供的明/暗配色皮肤的切换去解决这个问题7。
首先,在 Minimal Mistakes 主题配置文件 /_config.yml 引入一个新的词条 minimal_mistakes_skin_dark,
minimal_mistakes_skin: "default"
minimal_mistakes_skin_dark: "dark"
接着,在网站中的创建一个文件 /assets/css/theme-dark.scss ,并在文件中插入以下行:
---
# Only the main Sass file needs front matter (the dashes are enough)
search: false
---
@charset "utf-8";

@import "minimal-mistakes/skins/dark"; // skin
@import "minimal-mistakes"; // main partials
然后,再在文件 /_includes/head/custom.html 中添加下面的内容,即:为皮肤配色的 <link> 标签加上一个 id 选择器,
<link rel="stylesheet" href="/assets/css/main.css" id="theme_source">
<link rel="stylesheet alternate" href="/assets/css/theme-dark.css" id="theme_source_dark">
 <script>
    let theme = sessionStorage.getItem('theme');
    if(theme === "dark")
    {
      sessionStorage.setItem('theme', 'dark');
      node1 = document.getElementById('theme_source');
      node2 = document.getElementById('theme_source_dark');
      node1.setAttribute('rel', 'stylesheet alternate');
      node2.setAttribute('rel', 'stylesheet');
    }
    else
    {
      sessionStorage.setItem('theme', 'light');
    }
 </script>
其中,light 和 dark 是 skin 和 skin_dark 的泛型。这些字符串与实际的皮肤名称无关。
最后,为明/暗模式配置一个按钮,将下面的内容作为 /_includes/masterhead.html 文件 <nav></nav> 标签中的最后一项:
<!-- 带旋转动画的太阳(点击时切换为月亮) -->
<i class="fas fa-moon" style="--fa-animation-duration: 8s; cursor: pointer;" onclick="
               // 切换主题
               const node1 = document.getElementById('theme_source');
               const node2 = document.getElementById('theme_source_dark');
               const isLight = node1.getAttribute('rel') === 'stylesheet';

               node1.setAttribute('rel', isLight ? 'stylesheet alternate' : 'stylesheet');
               node2.setAttribute('rel', isLight ? 'stylesheet' : 'stylesheet alternate');

               // 切换图标
               this.classList.toggle('fa-sun');
               this.classList.toggle('fa-moon');

               // 保持动画
               this.classList.add('fa-spin');
               setTimeout(() => this.classList.remove('fa-spin'), 800);

               // 存储状态
               sessionStorage.setItem('theme', isLight ? 'dark' : 'light');
               return false;">
</i>
代码块样式
目前暂时不太想折腾这个事情!等等看后续吧~
Algolia 搜索自动重建索引
在网站每次新发布文章时,需要为 Algolia 搜索重建索引,下面将 Algolia 搜索重建索引的过程加入 GitHub Actions 工作流中,
-
修改
/.github/workflows/jekyll.yml文件,在Build with Jekyll之前加入以下步骤,jobs: build: runs-on: ubuntu-latest steps: # ... 其他步骤保持不变 ... - name: Generate Algolia index env: ALGOLIA_API_KEY: $ # 使用Admin key run: | bundle exec jekyll algolia - name: Build with Jekyll # ... 其他步骤保持不变 ... -
在网站对应的 GitHub 仓库中配置
secrets.ALGOLIA_ADMIN_KEY,依次选择【Settings - Secrets and variables- Actions - New repository secret】,创建ALGOLIA_ADMIN_KEY密钥(注意:不要选择成创建环境密钥了)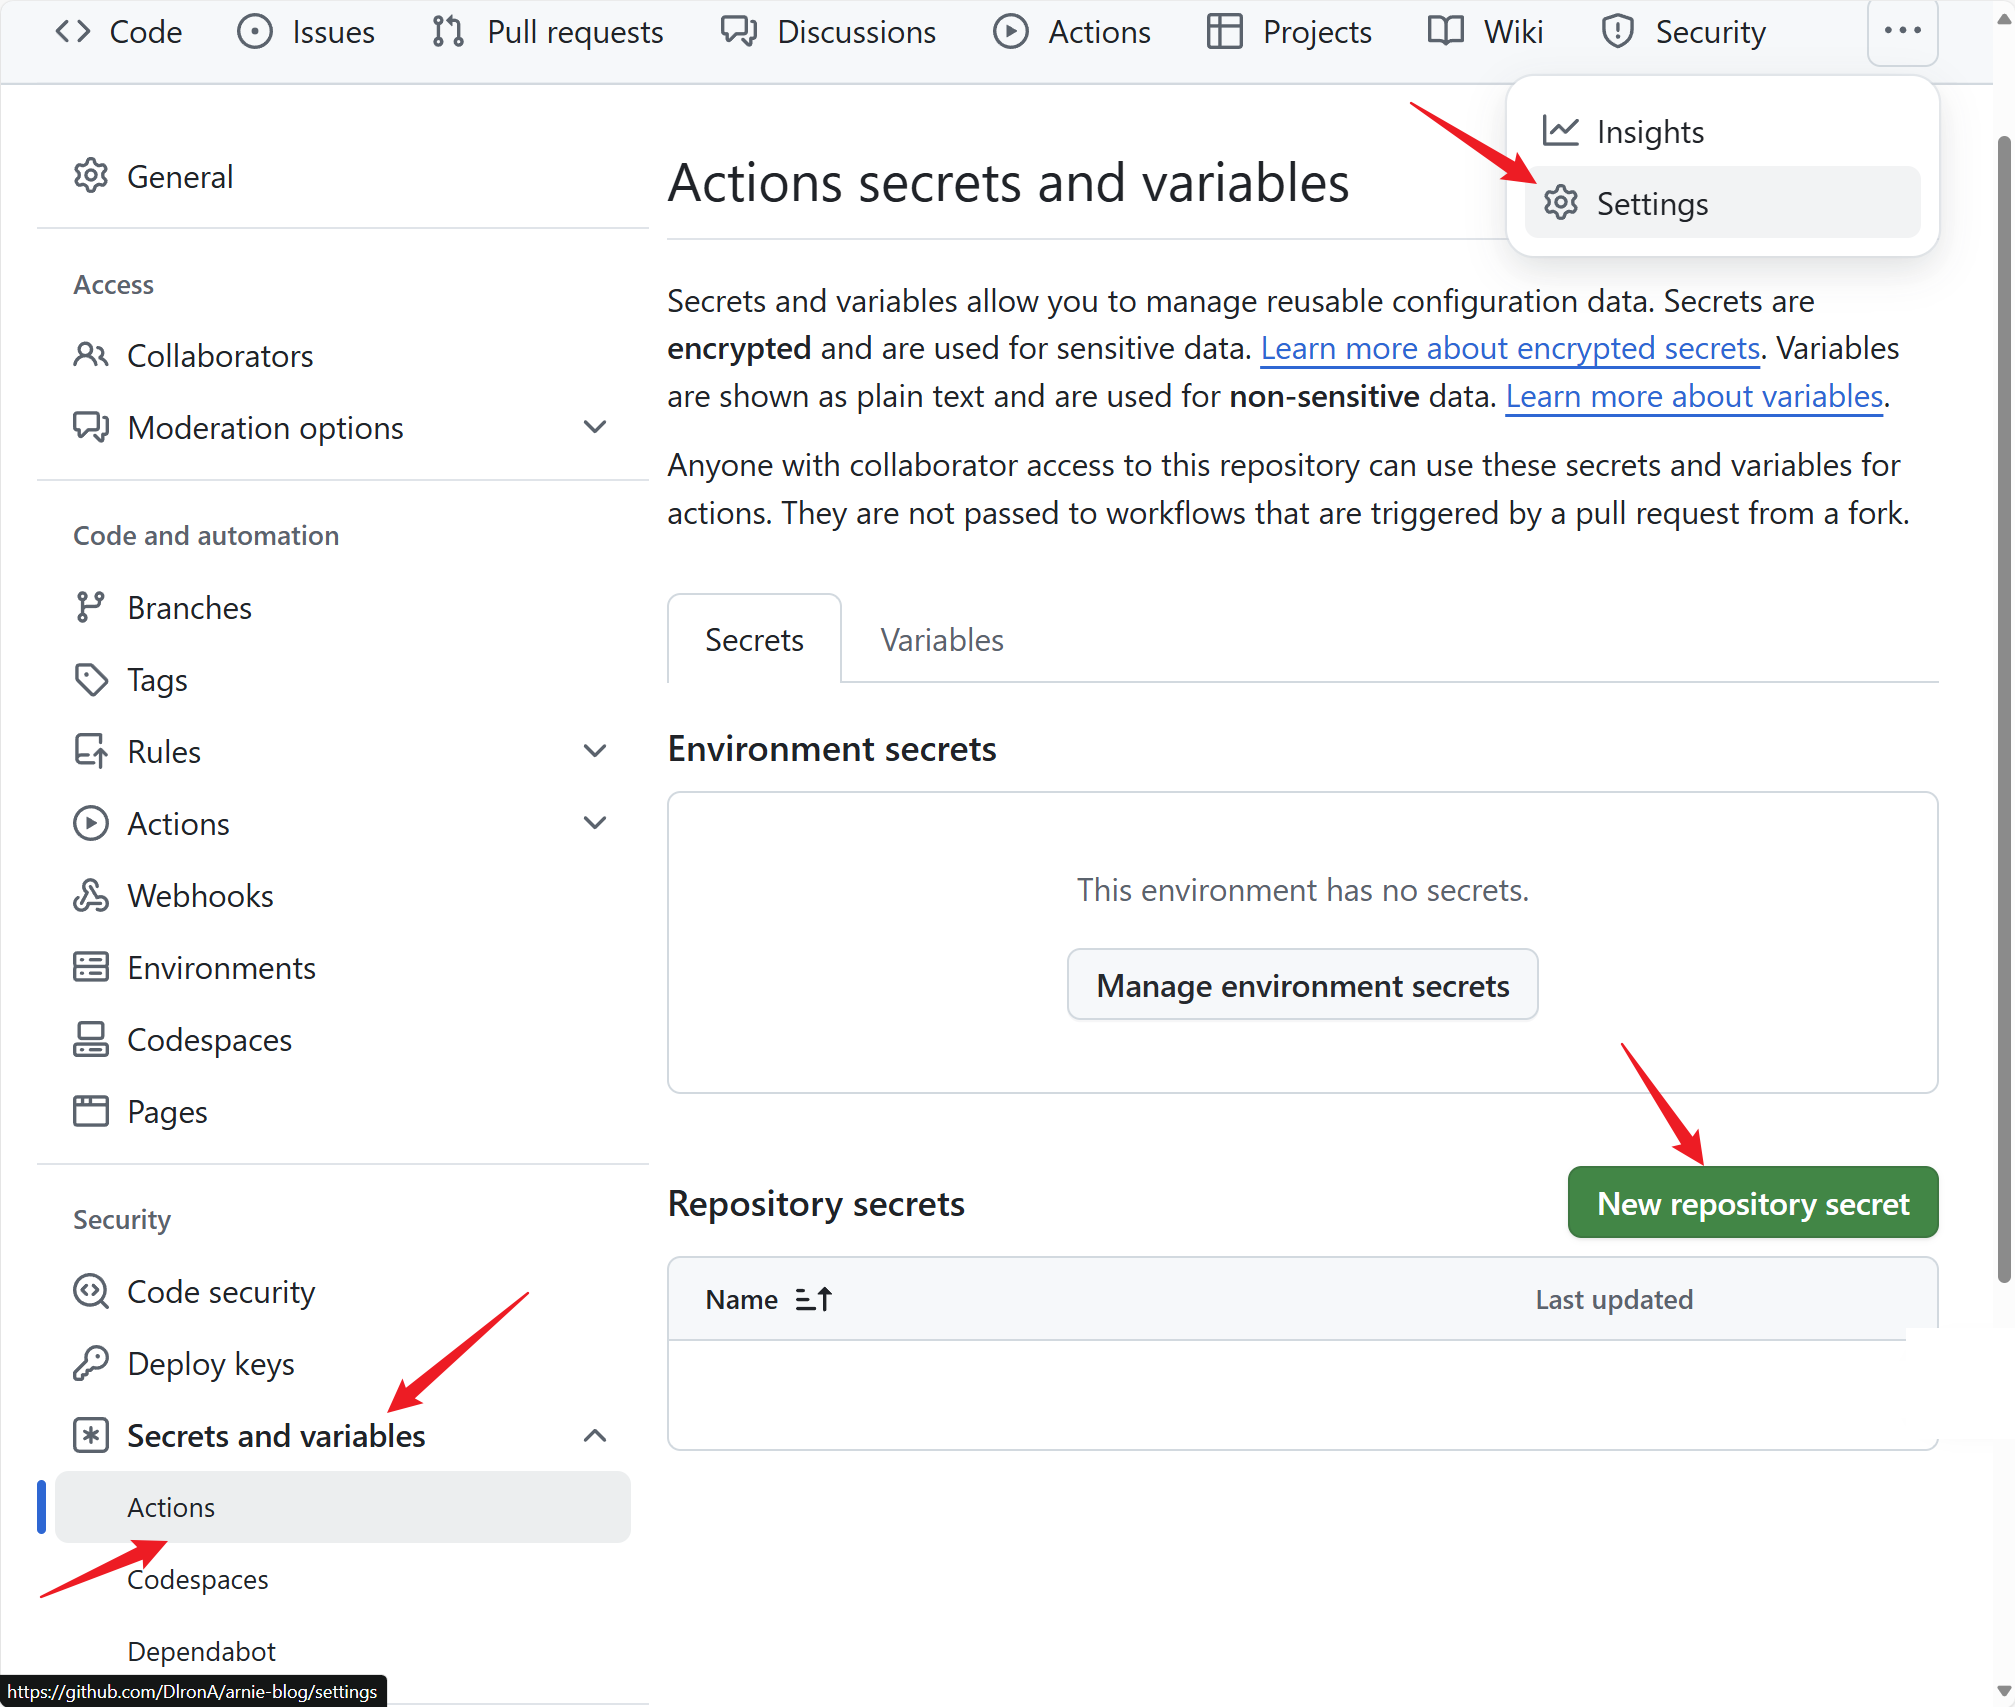
-
在主题配置文件
/_config.yml中再对algolia进行一些额外的配置(可选),也可以通过 Algolia 网站直接进行设置,algolia: # 插件专用参数 (新增) settings: attributesForFaceting: ["tags"] searchableAttributes: ["title", "excerpt", "content", "categories", "tags", "date"] files_to_exclude: - _drafts/*.md - node_modules/**/*
最后,当每次将修改好的文件 push 到网站远程的 GitHub 仓库中时,Algolia 搜索就会根据新增内容自动重建索引。

数学公式适配
kramdown 和 MathJax
Jekyll 选择 kramdown8作为 Markdown 解译器还是有道理的,借助于 MathJax 引擎,虽然它行内公式和行间公式用的公式定界符都是 $...$,但是这真的不妨碍它好使呀,目前是尝试下来和 Jekyll 生成的静态网页适配性最高的,同时也是操作起来最方便的,比较符合日常使用 Markdown 的习惯。
通过 VSCode 的 Markdown+Math 插件配置公式定界符为 '"mdmath.delimiters": kramdown',也算是真正意义上实现了所见即所得了,本地编译器中是什么样,上传到网站上显示出来的也是什么样(P.S., 这一套规则在 Typora 上同样适配)。
当然由于 kramdown 是用于解析和转换 Markdown 的超集(不同于 CommonMark9),所以在语法上还是有一些需要注意的10,下面重点说一下关于数学公示的编写,
-
kramdown 是通过空行来区分行内公式和行间公式的,即:行间公式前后都需要空一行
$$ \text{这是一个行内公式!} $$

这是一个行间公式!

$$
\text{这是一个行间公式!}
$$

这是一个行间公式!
需要注意的是,在数学语句中使用管道符号 | 的 LaTeX 代码可能会导致一行被识别为表格行。使用 \vert 命令而不是 | 命令可以避免这个问题!这一点即使在非数学语句中也同样需要注意,因为管道符号 | 属于一个特殊字符11,所以如果想要表达管道符号 | 本身的话,需要借助于转义字符 \。
需要注意是,还是尽量使用 CommonMark 所规范的 Markdown 语法12,这也是很多日常所使用的编辑器,比如:Obsidian 和 Typora 等所共同支持的,虽然 kramdown 有很多很诱人的新特性,比如:Inline Attribute Lists,可以自定义各式各样的 Block,但是能够适配 kramdown 的编辑器很少,做不到所见即所得,而且兼容性堪忧,所以为了减少麻烦,还是老老实实使用 CommonMark 规范吧。
MathJax 配置
在使用 Jekyll 默认的 Markdown 解译器 kramdown 的基础上,为 kramdown 配置 MathJax 作为数学公式渲染引擎(其实,kramdown 支持配置多款不同的公式渲染引擎,比如:MathJax,KaTeX 和 SsKaTeX 等等,至于选择 MathJax 的原因可以看我之前写的一篇文章:Markdown中的数学公式)。
首先,需要在 Jekyll 的配置文件 _config.yml 中先配置 kramdown 作为默认的解译器,
# Conversion
# Ref: https://www.jekyll.com.cn/docs/configuration/markdown/
markdown: kramdown # kramdown(default), CommonMark, CommonMarkGhPages,
highlighter: rouge
lsi: false
excerpt_separator: "\n\n"
incremental: false
接着,继续在 _config.yml 文件中对 kramdown 进行进一步的配置12,添加一项 math_engine,其余保持默认
# Markdown Processing
# Kramdown
# Ref: https://kramdown.gettalong.org/options.html
kramdown:
+ math_engine: mathjax # 设置数学引擎
  input: GFM
  hard_wrap: false
  auto_ids: true
  footnote_nr: 1
  entity_output: as_char
  toc_levels: 1..6
  smart_quotes: lsquo,rsquo,ldquo,rdquo
  enable_coderay: false
最后,将 MathJax 导入到网站的头文件(/_includes/head/custom.html)中即可13,
<!-- Ref:TeX Input Processor Options: https://docs.mathjax.org/en/latest/options/input/tex.html -->
<script>
    MathJax = {
        tex: {
            packages: { '[+]': ['base', 'autoload'] },
            // inlineMath: [ // 禁用 $...$,改用 \(...\) 作为行内公式
            //     ['\\(', '\\)']
            // ],
            // displayMath: [ // 块级公式用 \[...\]
            //     ['$$', '$$'],
            //     ['\\[', '\\]']
            // ],
            processEscapes: true,      // use \$ to produce a literal dollar sign
            processEnvironments: true, // process \begin{xxx}...\end{xxx} outside math mode

        },
        processRefs: true,         // process \ref{...} outside of math mode
        digits: /^(?:[0-9]+(?:\{,\}[0-9]{3})*(?:\.[0-9]*)?|\.[0-9]+)/,
        // pattern for recognizing numbers
        tags: 'ams',              // or 'ams' or 'all'
        tagSide: 'right',          // side for \tag macros
        tagIndent: '0.8em',        // amount to indent tags
        useLabelIds: true,         // use label name rather than tag for ids
        maxMacros: 10000,          // maximum number of macro substitutions per expression
        maxBuffer: 5 * 1024,       // maximum size for the internal TeX string (5K)
    };
</script>

<script id="MathJax-script" async src="https://cdn.jsdelivr.net/npm/mathjax@3/es5/tex-chtml.js">
</script>
参考资料
-
Overriding Theme Defaults - Minimal Mistakes: https://mmistakes.github.io/minimal-mistakes/docs/overriding-theme-defaults/ ↩
-
Environments - Jekyll : https://jekyllrb.com/docs/configuration/environments/ ↩
-
Dependency versions - GitHub Pages: https://pages.github.com/versions/ ↩
-
Navigation - Minimal Mistakes: https://mmistakes.github.io/minimal-mistakes/docs/navigation/ ↩
-
Stylesheets - Minimal Mistakes: https://mmistakes.github.io/minimal-mistakes/docs/stylesheets/ ↩
-
Allow user to toggle between themes [light/dark]-Discussion #2033: https://github.com/mmistakes/minimal-mistakes/discussions/2033 ↩
-
Adding a Dark/Light Theme Switcher to Minimal Mistakes @ Critical Point: https://humberto.stein-shiromoto.net/posts/2022/09/27/blog-post_adding_theme_switch_to_minimal_mistakes ↩
-
Home - kramdown: https://kramdown.gettalong.org/index.html ↩
-
CommonMark: https://commonmark.org/ ↩
-
Syntax - kramdown: https://kramdown.gettalong.org/syntax.html ↩
-
Syntax - kramdown: https://kramdown.gettalong.org/syntax.html#automatic-and-manual-escaping ↩
-
Markdown Options - Jekyll: https://www.jekyll.com.cn/docs/configuration/markdown/#kramdown ↩ ↩2
-
TeX Input Processor Options — MathJax 3.2 documentation: https://docs.mathjax.org/en/latest/options/input/tex.html ↩

留下评论